
In the vast and innovative global of Minecraft, gamers have the liberty to create and customize their virtual environments. One of the most usually unnoticed factors in Minecraft construction tasks is the sink. A Minecraft sink adds functionality and aesthetics to any shape, whether or not it’s a comfy domestic, a bustling city, or a complex fortress. In this step-by-step guide, we can stroll you through the technique of constructing a running in Minecraft Sink, so you can decorate your creations with a hint of practicality and fashion. Let’s dive in!

Section 1: Planning and Gathering Materials
Before you begin building your Minecraft sink, it is important to plan out the design and acquire the vital materials. Consider the general style of your construction and the available space for the sink. For an easy sink, you may need the following substances:
1 Water Bucket
1 Chest
1 Crafting Table
1 Furnace
1 Cauldron
Building blocks of your preference (inclusive of stone, timber, or quartz)
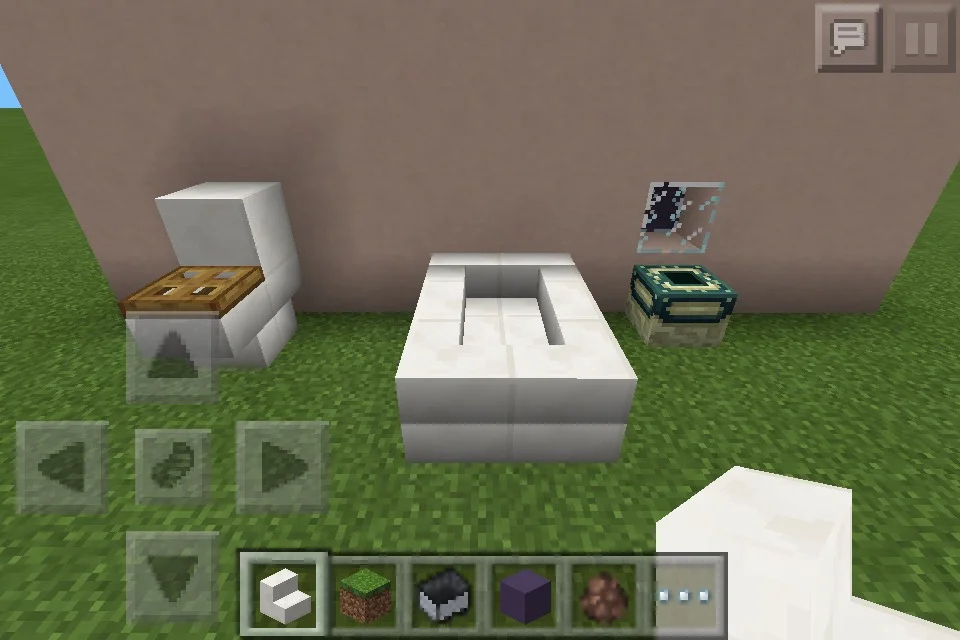
Section 2: Constructing the Minecraft Sink Frame
To build the sink body, choose the right place within your shape. Here’s how you can create a basic sink body:
- Place blocks horizontally, leaving a one-block gap among them.
- Stack more blocks vertically on every end of the horizontal blocks.
- Connect the two vertical blocks with a horizontal block at the top, forming a rectangular body.
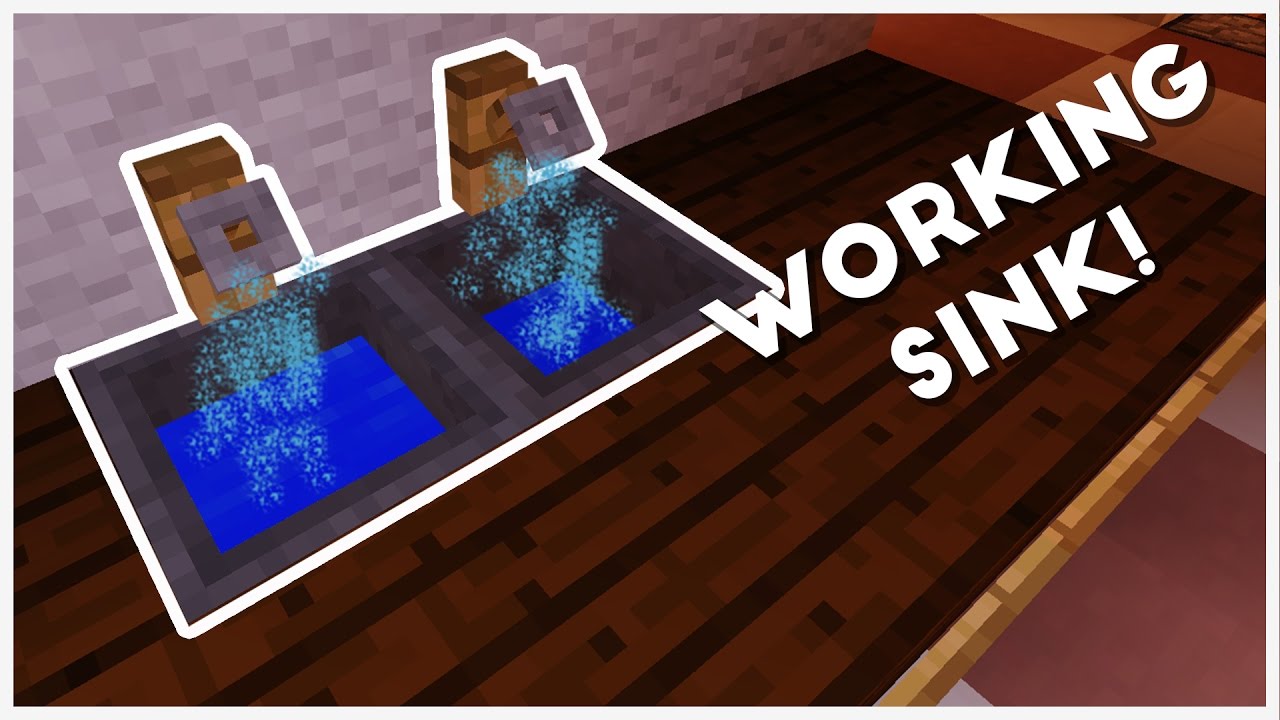
Section 3: Adding the Water Source
The subsequent step is to add the water source to the Minecraft sink. Follow these instructions:
- Fill a bucket with water by right-clicking on a water supply block.
- Place the water bucket in one of the corners of the sink frame.
- The water will flow into the sink, growing a basin for laundry.
Section 4: Installing the Functional Components
Now it’s time to add the functional components to the sink. Here’s what you want to do:
- Place a chest adjoining the sink frame. This chest will function as storage for your utensils and different objects.
- Position a crafting desk near the sink for a smooth right of entry to crafting recipes and equipment.
- Install a furnace next to the sink for smelting ores and cooking meals.
- Finally, region a cauldron adjacent to the sink to collect water for brewing or aesthetic functions.
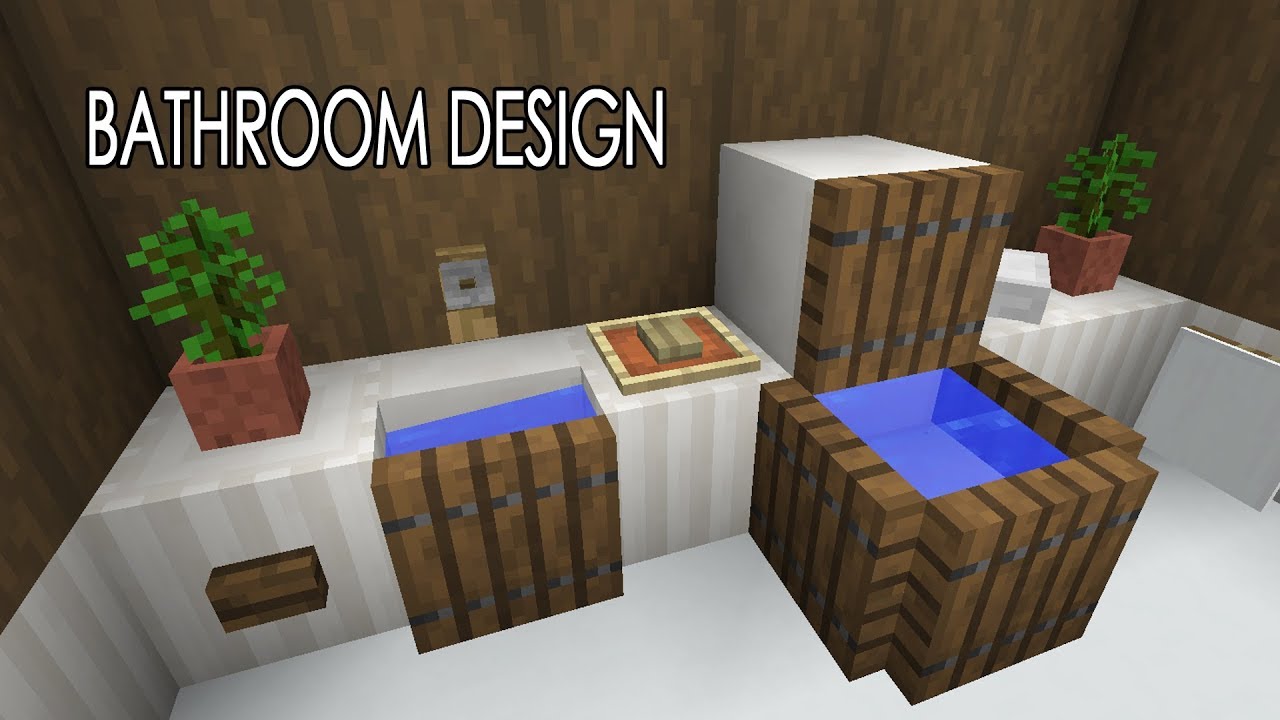
Section 5: Customizing and Decorative Touches
To make your Minecraft sink visually attractive, you may customize and upload decorative touches. Consider the following ideas:
- Surround the sink with distinct styles of blocks to create an appealing border.
- Add trapdoors or slabs to imitate a counter area around the sink.
- Place symptoms or object frames to label the chest and offer visual cues for the sink’s cause.
Section 6: Maintenance and Upkeep
To keep the functionality of your Minecraft sink, keep those hints in mind:

- Refill the cauldron with water with the use of a water bucket whenever it runs dry.
- Use the crafting desk and furnace responsibly to ensure their longevity.
- Occasionally tidy up the storage chest, doing away with needless items to optimize the area.
Conclusion:
By following this step-by-step guide, you currently have the expertise and equipment to construct a running in Minecraft Sink. Adding a sink to your creations no longer most effectively enhances their practicality however additionally adds a realistic touch. Experiment with distinct materials, designs, and ornamental elements to make your sink certainly unique. Happy crafting in Minecraft!


